Making animations
In this tutorial, we will find out how to make animations from Hyperion output.
Example model
To start with we will use a model very similar to Plotting and writing images but this time we only compute the image in one wavelength bin, but for a number of different viewing angles:
import numpy as np

from hyperion.model import Model
from hyperion.util.constants import pc, lsun

# Initialize model
m = Model()

# Set up 64x64x64 cartesian grid
w = np.linspace(-pc, pc, 64)
m.set_cartesian_grid(w, w, w)

# Add density grid with constant density and add a higher density cube inside to
# cause a shadow.
density = np.ones(m.grid.shape) * 1e-21
density[26:38, 26:38, 26:38] = 1.e-18
m.add_density_grid(density, 'kmh_lite.hdf5')

# Add a point source in the center
s = m.add_point_source()
s.position = (0.4 * pc, 0., 0.)
s.luminosity = 1000 * lsun
s.temperature = 6000.

# Add multi-wavelength image for a single viewing angle
image = m.add_peeled_images(sed=False, image=True)
image.set_wavelength_range(1, 190., 210.)
image.set_viewing_angles(np.repeat(45., 36), np.linspace(5., 355., 36))
image.set_image_size(400, 400)
image.set_image_limits(-1.5 * pc, 1.5 * pc, -1.5 * pc, 1.5 * pc)

# Set runtime parameters. We turn off scattering for the imaging since it is not
# important at these wavelengths.
m.set_n_initial_iterations(5)
m.set_raytracing(True)
m.set_n_photons(initial=4e6, imaging=0,
                raytracing_sources=1, raytracing_dust=1e7)

# Write out input file
m.write('flyaround_cube.rtin')
m.run('flyaround_cube.rtout', mpi=True)
Making a fly-around movie
The following script describes how to generate PNG frames for an animation:
import os
import numpy as np
import matplotlib.pyplot as plt
from hyperion.model import ModelOutput
from hyperion.util.constants import pc
# Create output directory if it does not already exist
if not os.path.exists('frames'):
os.mkdir('frames')
# Open model
m = ModelOutput('flyaround_cube.rtout')
# Read image from model
image = m.get_image(distance=300 * pc, units='MJy/sr')
# image.val is now an array with four dimensions (n_view, n_y, n_x, n_wav)
for iview in range(image.val.shape[0]):
# Open figure and create axes
fig = plt.figure(figsize=(3, 3))
ax = fig.add_subplot(1, 1, 1)
# This is the command to show the image. The parameters vmin and vmax are
# the min and max levels for the grayscale (remove for default values).
# The colormap is set here to be a heat map. Other possible heat maps
# include plt.cm.gray (grayscale), plt.cm.gist_yarg (inverted grayscale),
# plt.cm.jet (default, colorful). The np.sqrt() is used to plot the
# images on a sqrt stretch.
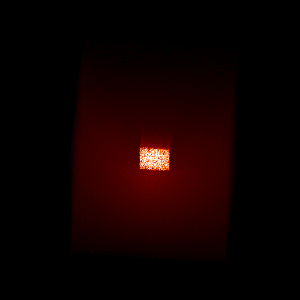
ax.imshow(np.sqrt(image.val[iview, :, :, 0]), vmin=0, vmax=np.sqrt(2000.),
cmap=plt.cm.gist_heat, origin='lower')
# Save figure. The facecolor='black' and edgecolor='black' are for
# esthetics, and hide the axes
fig.savefig('frames/frame_%05i.png' % iview,
facecolor='black', edgecolor='black')
# Close figure
plt.close(fig)
The frames can then be combined into a GIF animation using ImageMagick:
$ convert -delay 10 -adjoin frames/*.png movie.gif
The delay value is the delay between frames in 1/100ths of a second. The result is the following: